Capturing new teams as a package in App Volumes 4.x
Article ID: 321547
Updated On:
Products
VMware
Issue/Introduction
The new Teams uses MSIX packages therefore it is not possible to capture in app volumes using the standard procedure of capturing a package. Using the app volumes tools, the new teams can be captured as a package in App Volumes.
Environment
VMware App Volumes 4.x
Resolution
Pre-Requisites:
- On the capturing VM, App Volumes Tools need to be installed
- Before capturing the new teams application, download the below mentioned files on the capturing VM:
- Download the new Teams for work or school from the link: https://www.microsoft.com/en-ie/microsoft-teams/download-app
- Download msixmgr from this link: https://aka.ms/msixmgr
Open Disk Management in the capture VM and follow the below steps to create a .vhd disk:
-
Click on Action and select 'Create VHD'. -
In the location path, give the path to store the .vhd disk on the capture VM. -
Confirm the settings as per the screenshot below: -
Right click on the new disk and initialize it. -
Create a new simple volume and assign a drive letter. (Follow the default options)
Run the below command using admin CMD: msixmgr.exe -Unpack -packagePath "<path of MSTeams-x64.msix>" -destination "<DriveLetter>\apps" -applyacls Dir <DriveLetter>\apps Copy the folder name as shown below and paste it in a notepad for later use:Run the DISKPART on the elevated Command prompt and set the attribute of the VHD disk to NODEFAULTDRIVELETTER:
-
Diskpart -
List Volume -
select volume <volume number of the vhd volume> -
Attributes volume set NODEFAULTDRIVELETTER -
Exit
Once the DISKPART task is complete, restart the capture VM.

After rebooting the VM, open the elevated Command Prompt and change directory to C:\Program Files (x86)\VMware\AppCapture

Run the below command:
appcapture.exe /addmeta "c:\CaptureVHD\Team_2.0.vhd" /msix apps\MSTeams_24004.1309.2689.2246_x64__8wekyb3d8bbwe

Note: There is a space in the above command after /msix

A successful output will be seen as below: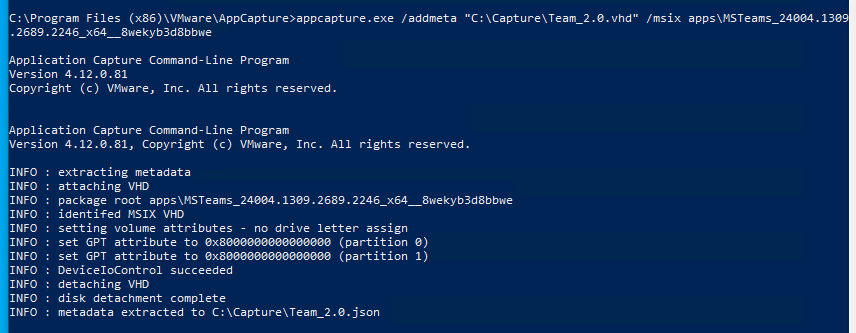
Once, the .vhd is ready, convert the .vhd file to a .vmdk format using the below command:
Appcapture.exe /msixvmdk "c:\Capture\Team_2.0.vhd"

The .vmdk file should be created in the capture folder: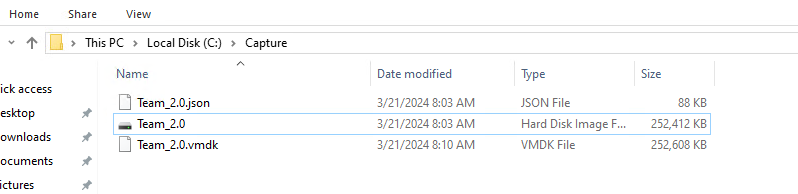
Copy the Teams_2.0.json and Teams_2.0.vmdk files to the app volume server under the location:
<installation_directory>\CloudVolumes\Manager\ppv\packages

Note: If the packages folder doesn't exists then create it.

Rename the Teams_2.0.vmdk to Team_2.0_workstation.vmdk

Login to the app volume manager and upload the Teams_2.0 package to the vCenter's datastore:
Go to Configuration -> Storage -> Upload Templates

There should be a new filename called "Teams_2.0_workstation.vmdk"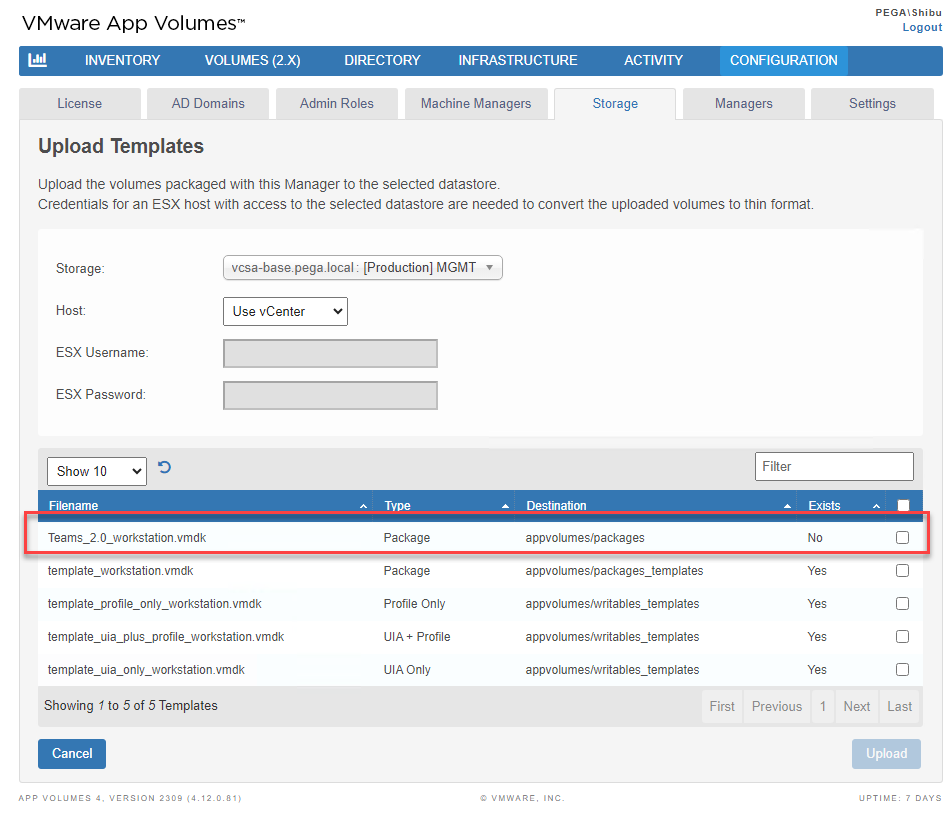
Select the "Teams_2.0_workstation.vmdk" and upload it to the datastore.
The Teams 2.0 package should appear in the datastore as shown below:
Import the "Teams_2.0" package in the app volumes manager if it doesn't appear.
Feedback
Yes
No
Powered by
