How to format vSAN Disk Groups with a legacy format version
Article ID: 326580
Updated On:
Products
VMware vSAN
Issue/Introduction
This article provides steps to format a vSAN disk with a legacy version in order to maintain compatibility during the upgrade process.
You might experience compatibility issues while adding or replacing disks under these conditions:
- The vSAN cluster is partiaily upgraded.
- The vSAN cluster is upgraded to a newer ESXi version but the on-disk format has not been upgraded.
- The vSAN cluster contains mixed ESXi versions.
- The disk format version in use by one or more hosts in the cluster is newer than the current version of the cluster.
Therefore, it is important to format new disks with the legacy version in order to maintain compatibility during the upgrade process or create the new disk group(s)/add disks after the cluster upgrade has been completed.
Environment
VMware vSAN 6.x
Resolution
It is generally recommended to continue with the vSAN on-disk upgrade process. However, if needed, you can format a vSAN disk group with a legacy version by adjusting the maximum possible on-disk format version by using an advanced-configuration parameter from the vSphere Client or the ESXi command line.
Notes:
- If this configuration change is made, subsequent attempts to execute an on-disk format upgrade will fail unless the change is reverted and the original value is restored.
- While a host has this setting change in effect, the vSAN Health Service may report an alarm indicating that the vSAN advanced configuration is not in sync. This is an expected behavior, and the alarm will clear after the default values are restored.
vSphere Client
1) Log in to the vSphere Client.
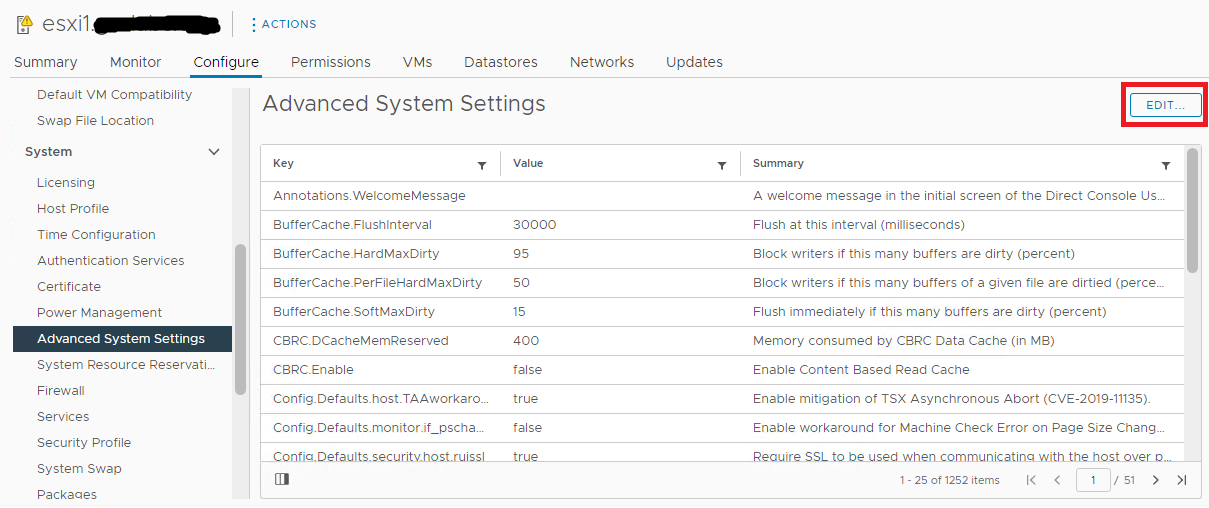
2) Select a host and then navigate to Configure > System > Advanced System Settings then click on Edit
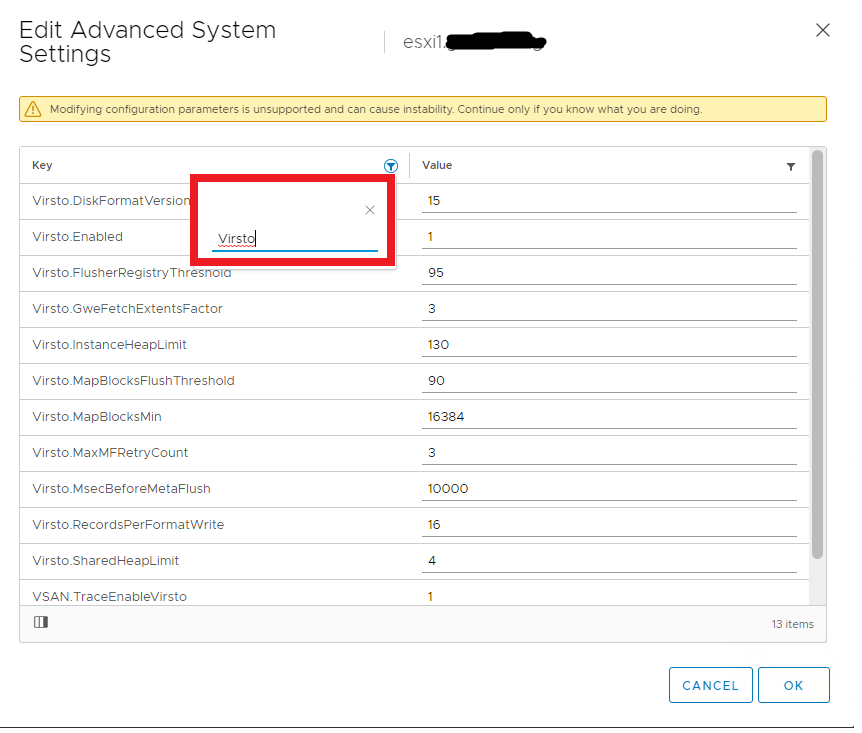
3) Click on the filter in the Key tab.

4) Search for Virsto to pull up the Virsto settings.
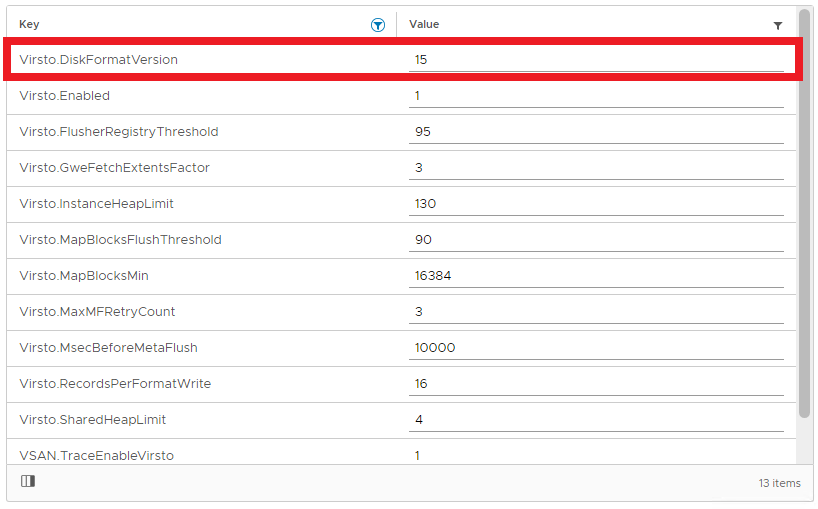
5) Note the current value of Virsto.DiskFormatVersion for later:
6) Set the maximum on-disk format version based on the version used by other hosts in the cluster. For more information, see Understanding vSAN on-disk format versions (2145267).
2) Select a host and then navigate to Configure > System > Advanced System Settings then click on Edit
3) Click on the filter in the Key tab.
4) Search for Virsto to pull up the Virsto settings.
5) Note the current value of Virsto.DiskFormatVersion for later:
6) Set the maximum on-disk format version based on the version used by other hosts in the cluster. For more information, see Understanding vSAN on-disk format versions (2145267).
- If the host or other hosts use version 3 or 4, or a combination of 4 and 5, configure the maximum on-disk format version to 4.
- The disks are formatted to the newest version when the on-disk upgrade process is rerun.
- If the host or other hosts use version 2.5 or a combination of versions 2.5 and 3 per vCenter Server, configure the maximum on-disk format version to 2.
- The disks are formatted to the newest version when the on-disk upgrade process is rerun.
- If the host or other hosts use version 2 per vCenter, configure the maximum on-disk format version to 2.
7) Replace or add disks as necessary.
8) After disks have been added or replaced, revert these changes by restoring the original value identified in step 5.
ESXi Command Line
- Log in to the ESXi host via SSH or remote KVM console.
- Determine the current maximum on-disk format version:
# esxcli system settings advanced list -o /Virsto/DiskFormatVersion
For example:
# esxcli system settings advanced list -o /Virsto/DiskFormatVersion
Path: /Virsto/DiskFormatVersion
Type: integer
Int Value: 4
Default Int Value: 4
Min Value: 2
Max Value: 4
String Value:
Default String Value:
Valid Characters:
Description: Virsto Disk Format version
- Set the maximum on-disk format version based on the version used by other hosts in the cluster, using this command:
# esxcli system settings advanced set -i -o /Virsto/DiskFormatVersion
For more information on the vSAN on-disk format version, see Understanding vSAN on-disk format versions (2145267).- If the host or other hosts use version 3 or 4, or a combination of 4 and 5, configure the maximum on-disk format version to 4.
The disks are formatted to the newest version when the on-disk upgrade process is rerun. - If the host or other hosts use version 2.5 or a combination of versions 2.5 and 3 per vCenter Server, configure the maximum on-disk format version to 2.
The disks are formatted to the newest version when the on-disk upgrade process is rerun. - If the host or other hosts use version 2 per vCenter, configure the maximum on-disk format version to 2.
For example:
# esxcli system settings advanced set -i 2 -o /Virsto/DiskFormatVersion
- If the host or other hosts use version 3 or 4, or a combination of 4 and 5, configure the maximum on-disk format version to 4.
- Replace or add disks as necessary.
- After disk-replacement activities are completed, return the parameter to the original value from step 1:
# esxcfg-advcfg -s /Virsto/DiskFormatVersion
For example:
# esxcli system settings advanced set -i 4 -o /Virsto/DiskFormatVersion
Additional Information
Feedback
Yes
No
Powered by
